As a second part of my discussion on WooCommerce vs Shopify, today I want to take you through something even more practical: how to actually build your own online store using WooCommerce.
Now, if you read my first post, you know I compared Shopify and WooCommerce and shared how both are powerful tools for e-commerce. But today, I’m going to show you step by step how to set up your own WooCommerce-based store.
Think of this as me standing on a stage, telling you a story about how to start small but dream big with your online shop.
How to Choosing the Perfect Domain Name 🌍
First things first: you need an address for your shop. That’s what a domain name is. Imagine your store in a busy city the signboard outside with your shop’s name is like your domain online.
When picking a domain, you want it to be:
Easy to remember
Relevant to your niche
Professional-looking
For example, if you’re starting a fashion store, you might go for:
modaliyafashion.comtrendystyles.storezyxfashion.shop
👉 Notice how I mixed endings like .com, .net, .store, .shop? Each has its vibe.
.com → The most popular and trusted (best for global appeal).
.net → Still strong, often used for tech or network-related businesses.
.store → Perfect if you want to highlight you’re running an actual online shop.
.shop → Modern, trendy, and short.
Your domain name is the signboard of your online shop. But how do you actually get one? Let me walk you through.
How to Search for a Domain
Go to a domain registrar like Namecheap, GoDaddy, Google Domains, or Hostinger.
Type your desired name in the search bar (example:
modaliyafashion.com).The system will instantly show you if it’s available or already taken.
If taken, they’ll suggest alternatives like
.net,.store,.shop, or slight variations.
How to Buy a Domain
Once you find an available domain you like, click Add to Cart.
Choose the registration period (usually 1 year, but I recommend at least 2 years if you’re serious).
Add Domain Privacy Protection (this hides your personal info from the public WHOIS database – important for security).
Proceed to checkout and pay (credit card, PayPal, or local methods depending on the provider).
💡 Pro Tip: Try to always secure the .com version if it’s available — it builds more trust. If it’s not, go with .store or .shop which are perfect for e-commerce.
Picking the Right Hosting Provider 💻
Once you’ve got your domain, you need a “home” for your website – that’s hosting. Think of it as renting a shop space in a shopping mall.
There are tons of hosting providers out there, but not all are equal. You want one that’s fast, reliable, secure, and affordable.
Here are Top 5 Hosting Providers for WooCommerce in 2025:
SiteGround – From $2.99/month (best for beginners, super reliable).
Bluehost – From $2.95/month (officially recommended by WordPress, easy setup).
Hostinger – From $1.99/month (very budget-friendly, good for startups).
A2 Hosting – From $2.99/month (great speed, optimized for WooCommerce).
Kinsta – From $30/month (premium choice, powerful and managed hosting).
| Hosting Provider | Starting Price (per month) | Best For | Key Features |
|---|---|---|---|
| Hostinger | $1.99 – $2.99 | Beginners & small stores | Very affordable, fast loading, easy WordPress setup |
| SiteGround | $2.99 – $4.99 | Balanced performance | Auto WooCommerce install, daily backups, strong security |
| Bluehost | $2.95 – $6.99 | Official WP recommendation | One-click WooCommerce, free domain for 1st year |
| A2 Hosting | $2.99+ | Speed-focused users | Turbo servers for faster loading, optimized for WooCommerce |
| Kinsta | $30 – $35+ | Growing/large businesses | Premium managed hosting, top-notch speed & scalability |
How to Connecting Your Domain to Hosting 🔗
Now you’ve got both pieces: your domain and your hosting. Time to connect them.
Here’s the simple step-by-step:
Log into your hosting account (e.g., SiteGround).
Go to Domain Management / DNS settings.
Update your domain’s nameservers (these are like addresses that point your domain to your hosting).
Example:
ns1.siteground.com,ns2.siteground.com.
Save settings.
Wait a few hours (sometimes up to 24 hours) for the connection to go live.
And boom, now your shop has both a name (domain) and a space to live (hosting).
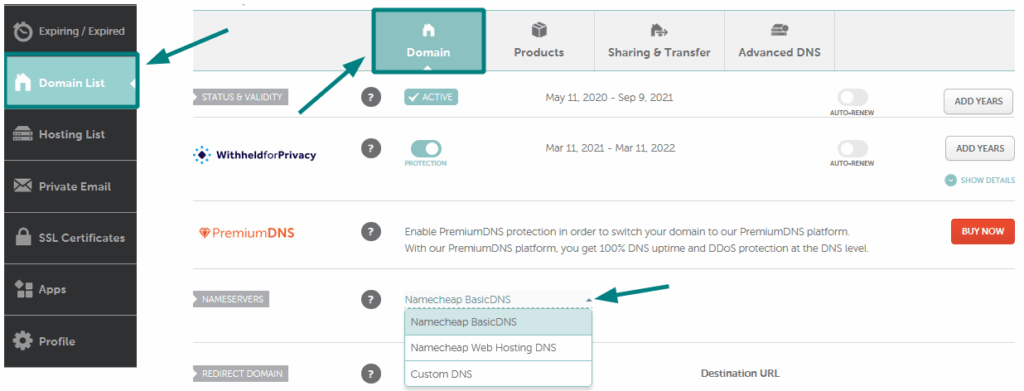
Here is the How to Change DNS For a Domain in namecheap.com Read the Full Article
How to Installing WordPress & WooCommerce ⚙️
This is where the magic begins. Most hosting providers now give you a 1-click WordPress install button.
Log into your hosting dashboard.
Click Install WordPress.
Follow the prompts (choose username, password, site title).
Once installed, log into your WordPress site via
yourdomain.com/wp-admin.
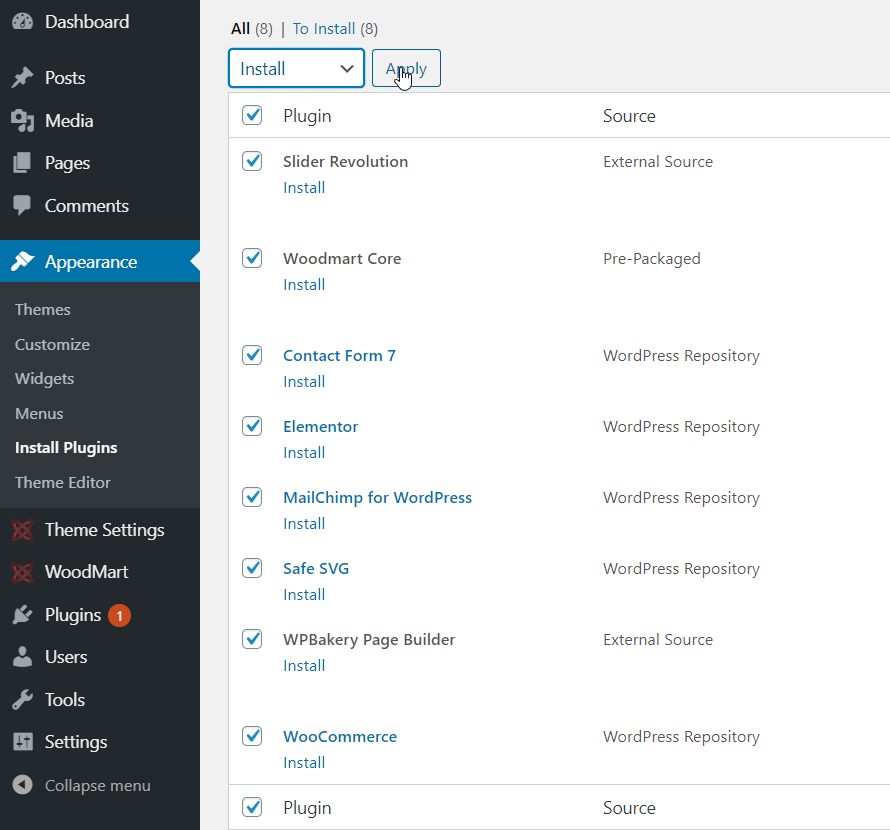
Now, let’s add WooCommerce:
Go to Plugins → Add New.
Search for “WooCommerce.”
Click Install → Activate.
A setup wizard will guide you (store address, currency, payment methods, etc.).
And just like that, your website is now an online store framework!

How to Choosing the Best WooCommerce Themes 🎨
Here are Top 5 WooCommerce Themes for Different Niches:
Astra → Lightweight, customizable, works for any niche.
Flatsome → Super popular, perfect for fashion/electronics.
OceanWP → Great for multipurpose, very flexible.
Storefront → Official WooCommerce theme, very simple and clean.
WoodMart → Stunning design, packed with features (fashion, furniture, multipurpose).
👉 Pick the one that matches your store type. For example:
Electronics → Flatsome
Fashion → WoodMart
General store → Astra
Customizing Your Store 🛠️
Once your theme is installed, it’s time to make it yours:
Go to Appearance → Customize.
Upload your logo.
Choose your colors & fonts.
Create menus: Home, Shop, About, Contact.
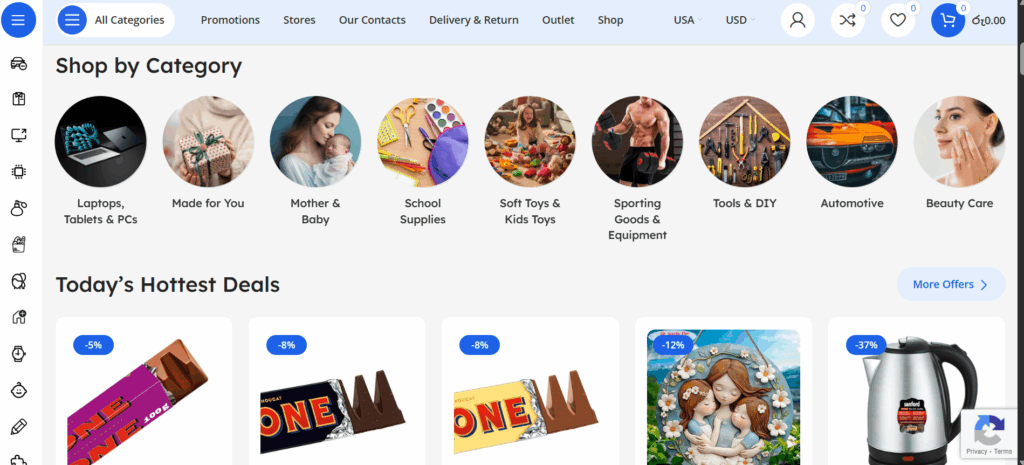
Add product categories (Fashion, Electronics, etc.).
This step is where your store starts to feel real.
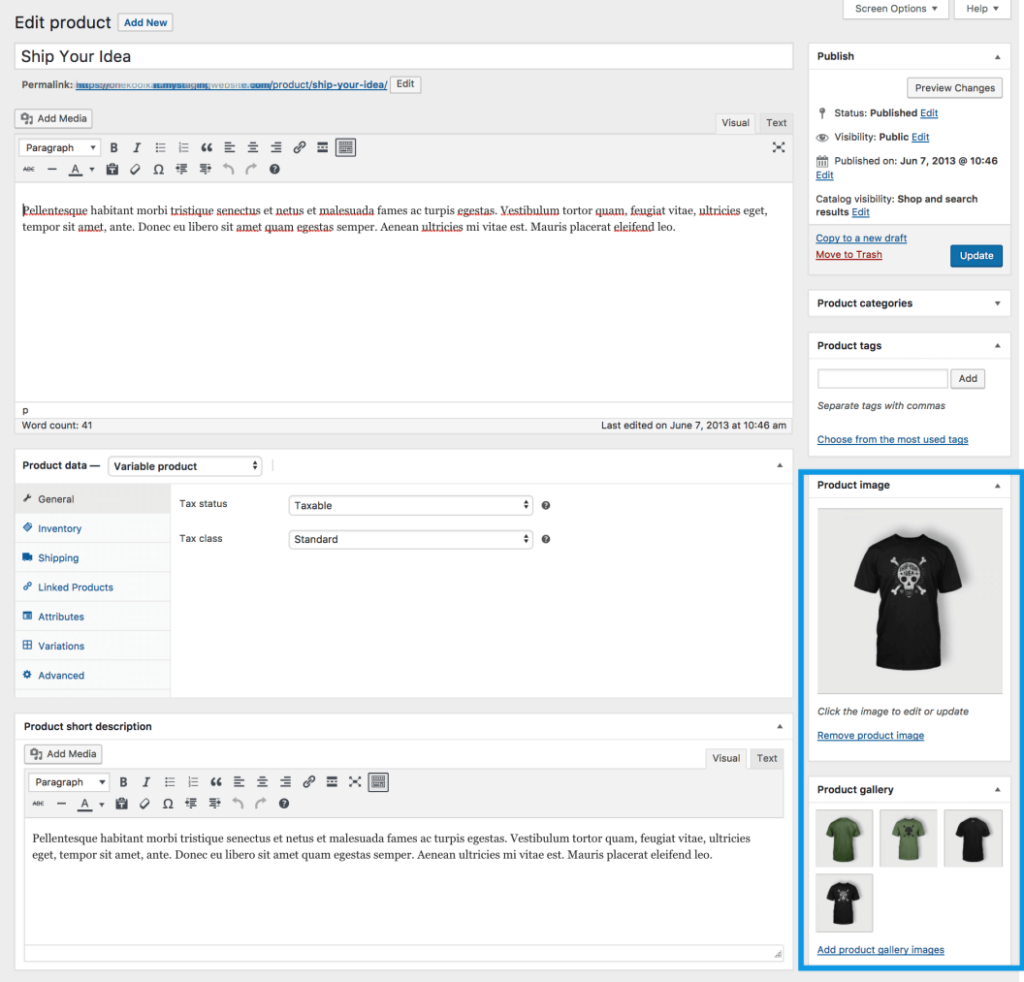
Adding Products to WooCommerce 🛒
This is the fun part – adding your products!
Here’s how:
Go to Products → Add New.
Enter product name (e.g., “Blue Denim Jacket”).
Add a description (tell a little story about it).
Upload product images (high quality, multiple angles).
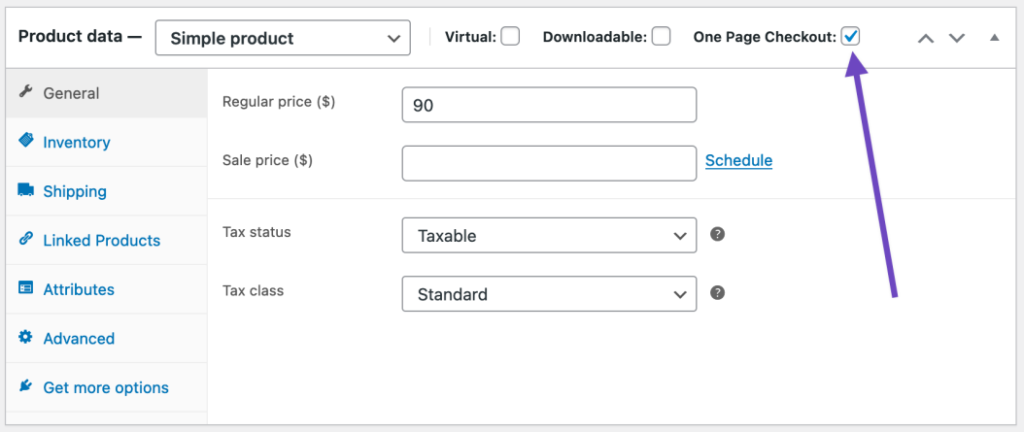
Set price (regular and sale price).
Choose category (e.g., Fashion → Jackets).
Add stock quantity.
Publish.
Repeat this for all your items, and you’ll see your shop filling up nicely.
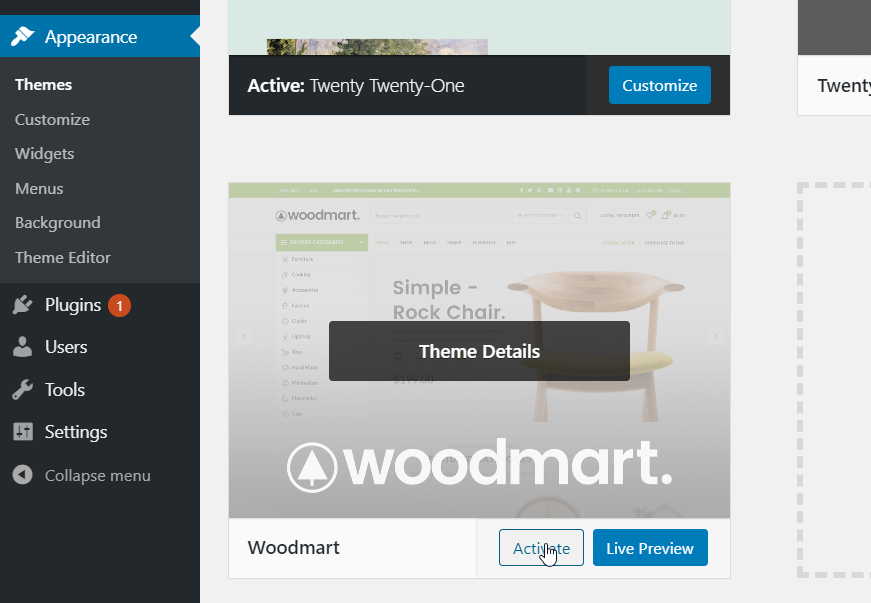
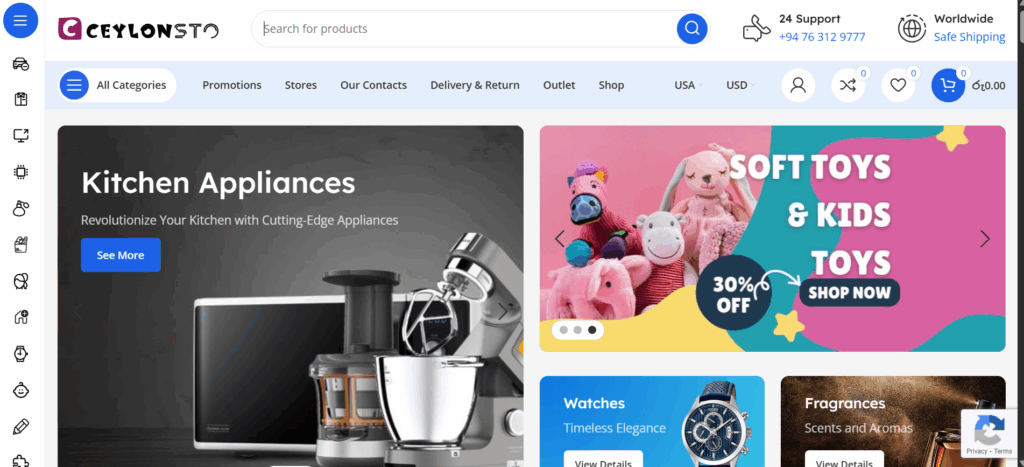
My Personal Story with WoodMart Theme 🌟
Now, let me share something personal. When I built my own store, Ceylonsto.com, I chose the WoodMart theme. Why? Because it checked every box I was looking for:
User-friendly – Easy to set up, even for someone without deep coding knowledge.
Mobile-friendly – Works beautifully on smartphones (and trust me, most buyers shop on mobile now).
Left-side category list – Makes it easy for shoppers to browse.
Amazing search option – Customers can quickly find what they’re looking for.
Unlimited updates – Always fresh and up-to-date.
To this day, I love how professional and smooth my site looks with WoodMart. Customers often tell me, “Your site feels just like a big e-commerce brand!”
👉 You can check it out yourself: Ceylonsto.com
So there you have it from picking the perfect domain, setting up WooCommerce, choosing a theme, adding your first products, to even learning from my own experience you now hold the complete roadmap to launching your very own online store.
The magic of WooCommerce is that it gives you complete freedom. You’re the boss. You decide how your store looks, how it works, and how it grows. You can start small, take it step by step, and still create something professional and powerful without breaking the bank.
And believe me, there’s nothing like the rush of seeing your first order come through. That moment makes all the hard work worth it and proves that your dream is now real.
So, are you ready to take that leap? To turn your idea into a thriving online business? Your store is waiting and your first sale could be just around the corner! 🚀